How To Use MomMed S21
If you’ve just unpacked your MomMed S21 breast pump and are wondering how to get started, you’re in the right place!
In this step-by-step guide, I’ll walk you through exactly how to use the MomMed S21 wearable breast pump—from what’s in the box and how to assemble each part, to adjusting suction levels, cleaning your pump, and troubleshooting common issues. Whether you’re a first-time pumper or switching from another model, this guide will help you feel confident and comfortable using your S21 breast pump.
Prefer to watch? Check out my full MomMed S21 how-to video above, then scroll down for the detailed written instructions.
Note: Pumping Milk is reader-supported, meaning, at no cost to you, I may earn a commission if you buy after clicking an affiliate link. Learn More.
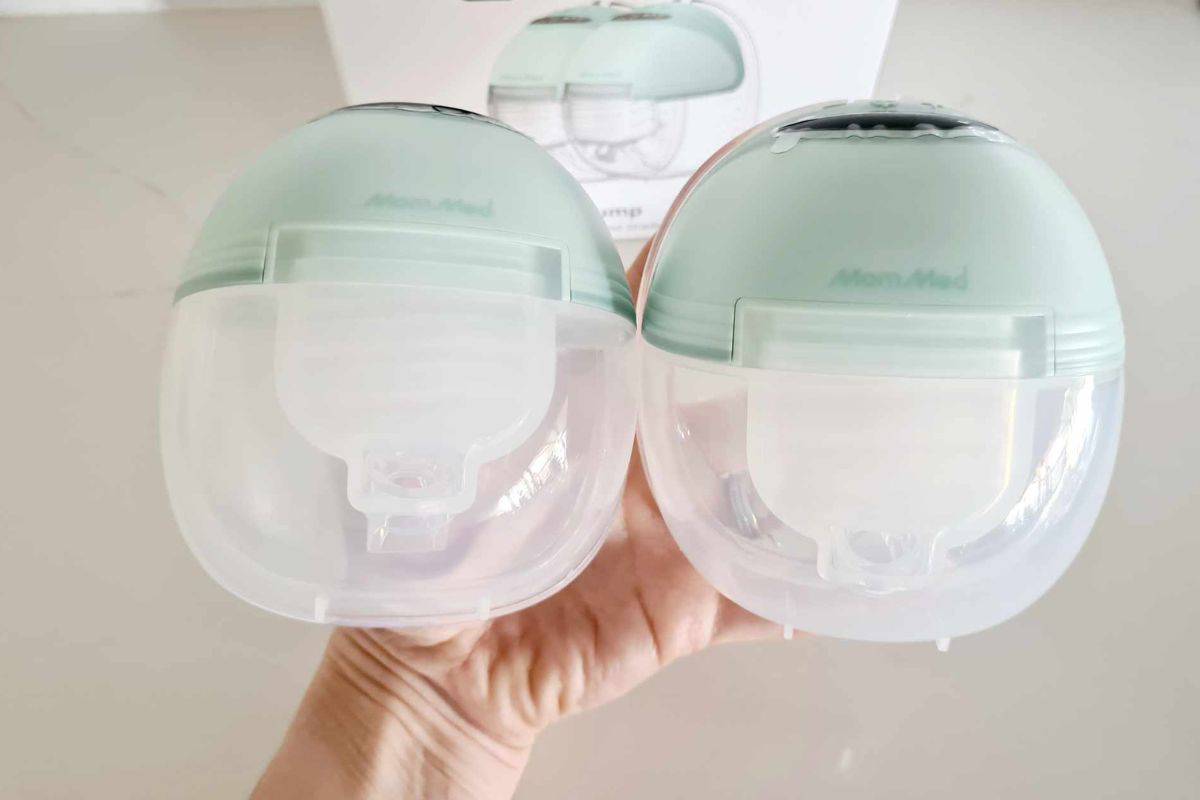
What’s Included with the MomMed S21
Before using your MomMed S21 breast pump, it’s important to make sure you have all the right parts—and that they’re clean, intact, and ready to go.

Here’s what’s typically included when you purchase the double MomMed S21 wearable breast pump:
- Pump Motors * 2
- Milk Collection Cups * 2
- Flanges (24mm) * 2
- 17mm Flange Insert * 2
- 19mm Flange Insert * 2
- 21mm Flange Insert * 2
- Duckbill Valves * 6
- Diaphragms * 4
- USB-C Charging Cables * 2
- Milk Storage Bags * 10
- Bra Adjustment Buckles * 2
- Nipple Ruler * 1
- Instruction Manual * 1
Always double-check the contents against the manual to ensure nothing is missing.
If you’ve bought your pump second-hand or received it as a gift, I highly recommend replacing all silicone parts (like the valves, diaphragms, and flanges) before first use. These pieces wear out over time and can affect suction strength and hygiene.
And if anything appears damaged or missing, don’t hesitate to contact MomMed customer service—they’re usually very helpful when it comes to replacements.
Once you’ve confirmed all parts are present and clean, you’re ready to move on to flange sizing and assembly!
Flange Sizing Matters
The MomMed S21 comes with a 24mm flange, but one of the things I really appreciate about this pump is that it also includes multiple flange insert sizes—so you can find a fit that’s right for you straight out of the box. if you need a larger flange, a 27mm flange is available to purchase separately.
Getting the right flange fit is more important than most people realize. A flange that’s too big can cause rubbing or soreness, while one that’s too small can compress your nipple and slow down your milk flow. Neither feels great—and both can impact your output.
That’s where the included nipple ruler comes in handy. Just measure the base of your nipple (excluding the areola) and add 1–2mm to find your ideal flange size. Then pop the corresponding insert into the flange before your session.
Here’s why a good fit matters:
- It helps prevent pain and discomfort
- Improves suction and milk expression
- Reduces the chance of clogged ducts
- Makes pumping feel easier and more natural
So before your first session, take a moment to measure and test the different sizes. It’s a small step that makes a big difference in both comfort and performance.

MomMed S21 Components
Before you jump into assembly, it helps to know what each part of the MomMed S21 does and how everything fits together. This wearable pump is designed to be lightweight, quiet, and simple to use—perfect for hands-free sessions whether you’re at home, at work, or on the go.
Here’s a quick breakdown of each component and its role:
- Pump Motor: This is the top unit that powers your pump. It attaches to the milk collector cup and houses the suction motor, digital screen, and controls. The display shows your mode, suction level, and timer, and it’s operated by three buttons on the front—making it super easy to adjust your settings without needing an app.
- Flange (24mm): The flange is the cone-shaped part that rests against your breast to create a seal. The MomMed S21 comes with a 24mm flange already assembled, but you can easily swap in a smaller insert for a better fit.
- Flange Inserts (17mm, 19mm, 21mm): These soft silicone inserts reduce the flange tunnel size and help create a more secure, comfortable fit. If the standard 24mm feels too big, just choose the insert that best matches your nipple size and pop it into place.
- Diaphragm: This is the soft silicone disc that sits at the top of the collection cup. It plays a key role in maintaining suction and keeping milk out of the motor. A secure diaphragm helps your pump function efficiently and hygienically.
- Duckbill Valve: The duckbill valve is a small, flexible piece that fits into the bottom of the milk collector cup. It opens with suction to allow milk to flow into the container, while preventing backflow.
- Milk Collection Cup: This is the wearable container that catches your milk during each session. It fits right into your bra and holds up to 180ml (about 6 oz) of milk. The cup also has a pouring spout, so you can easily transfer your milk into a bottle or storage bag.
- USB-C Charging Cable: The S21 charges using a USB-C cable, which plugs into the side of the pump motor. A full charge gives you up to 120 minutes of pumping time, depending on your suction level and session length.
Each part works together to give you a smooth, hands-free pumping experience that’s easy to set up and comfortable to use. Once you’re familiar with each component, you’ll be ready to move on to assembly.
How to Assemble the MomMed S21
Getting your MomMed S21 wearable breast pump set up is simple once you know where everything goes. But making sure it’s assembled correctly is essential for strong suction, leak-free pumping, and a comfortable fit.
As with any breast pump, before your first use, I recommend fully disassembling all parts and washing and then sterilizing them.
Once clean and dry, follow the steps below to assemble your pump:
Step 1
Wash your hands thoroughly with soap and water before handling any pump parts.
Step 2
Insert the duckbill valve into the small opening at the bottom of the collection container. Push it in gently but firmly—it should sit snugly in place. The tip should face downward into the cup.
Step 3
Place the diaphragm into the top opening of the collection container. It should press down evenly and form a flush seal around the edge. A well-fitted diaphragm helps maintain suction and keeps milk out of the motor.
Step 4
If you’re using a flange insert (17mm, 19mm, or 21mm), slide it inside the flange now. Make sure it’s pressed all the way in and sits flat within the flange tunnel.
Step 5
Align the flange with the front opening of the collection container. Press it down gently until it clicks into place. You’ll want to make sure the fit is tight and even around the edges. A loose flange is one of the most common causes of leaks or weak suction.
Step 6
Finally, attach the pump motor. Line it up with the top of the diaphragm and press it down until it locks into place. The motor should feel secure with no wobbling.
MomMed S21 Buttons and LED Screen
The MomMed S21 is designed to be simple and straightforward, with an easy-to-read LED screen and just three buttons to control your session. Whether you’re mid-pump or setting up for the first time, everything you need is right on top of the motor—no app required.
Here’s what each button does and how to use the display:
Power Button (Center)
- Press and hold to turn the pump on or off.
- A quick press will pause or resume your session.
- When powered on, the pump starts in stimulation mode with a default suction level and timer.
Plus (+) and Minus (–) Buttons
- Use these to adjust your suction strength during your session.
- Tap the plus button to increase suction or the minus to decrease it.
- There are multiple suction levels, so start low and work your way up if needed—comfort is key.
Mode Indicator (Icon on Screen)
- A wavy line icon means you’re in stimulation mode—best for starting your session and encouraging letdown.
- A droplet icon means expression mode—ideal for deeper suction and milk removal once letdown begins.
- Press the power button quickly to switch between modes during your session.
Timer Display
- The LED screen shows how long you’ve been pumping, in minutes.
- The timer counts up to 30 minutes, then the pump will automatically shut off.
Battery Indicator
- The battery icon appears in the top corner and gives you a quick look at your remaining charge.
- If the icon starts flashing, it’s time to recharge using the included USB-C cable.
The screen will dim automatically after a short period to save battery, but you can tap any button to wake it up again.
Using the MomMed S21 Breast Pump
Once your MomMed S21 is fully assembled and your flange size is sorted, you’re ready to begin your pumping session. Whether this is your first time using a wearable pump or you’re switching from another model, this simple walkthrough will help you get started with confidence.
Here’s how to use the MomMed S21:
Step 1: Wash Your Hands
Always start with clean hands. This helps protect your milk from contamination and keeps your pump parts hygienic.
Step 2: Position the Flange Correctly
Center your nipple in the middle of the flange tunnel. The fit should feel snug but not tight. If you’re using an insert, double-check that it’s seated properly inside the flange before positioning the pump.
Step 3: Secure the Pump in Your Bra
Place the fully assembled pump in your nursing bra. Adjust your bra so that the pump feels secure and upright. It should be snug enough to hold the pump in place without putting pressure on your breast.
Tip: Use the included bra strap buckles if your pump feels loose or leans forward. A stable fit helps maintain suction and prevents leaking.
Step 4: Power On the Pump
Press and hold the power button in the center to turn the pump on. You’ll see the digital screen light up and display the default timer, suction level, and mode.
Step 5: Choose a Pumping Mode
The MomMed S21 starts in stimulation mode (indicated by the wavy line icon). This mode uses quick, light suction to help trigger letdown.
Once your milk starts flowing, press the mode button again to switch to expression mode (droplet icon), which uses slower, deeper pulls to express milk more efficiently.
Step 6: Adjust Suction Levels
Use the plus (+) and minus (–) buttons to adjust suction strength. The S21 offers multiple suction levels, so start low and increase gradually if needed. You should feel a gentle tug—not pain.
Step 7: Monitor and Pump
Let the pump run for 15–20 minutes or until your milk flow slows. You can keep track of your time using the digital countdown timer on the screen. The S21 will automatically shut off after 30 minutes if you forget to stop it yourself.
Step 8: Turn Off and Remove the Pump
Press and hold the power button again to turn off the pump. Lean forward slightly and gently break the seal between the flange and your breast before removing the pump. This helps prevent discomfort or pulling.
Step 9: Transfer and Store Your Milk
Carefully pour the expressed milk from the collection cup into a clean bottle or storage bag using the built-in spout. You can refer to my storing breast milk guide if you’re unsure on the correct way to store breast milk.
Step 10: Clean Your Pump
Disassemble all milk-contact parts—like the flange, insert, diaphragm, valve, and collection cup—and wash them in warm, soapy water. Rinse thoroughly and air dry completely before next use.
The pump motor should never be submerged. Just wipe it down with a clean, dry cloth if needed.
Step 11: Recharge When Needed
Use the included USB-C cable to recharge the motor between sessions. A full charge typically provides up to 120 minutes of pumping time.
MomMed S21 Replacement Parts
Like any breast pump, the MomMed S21 relies on a few key parts to maintain strong suction and a comfortable, efficient experience. Over time, some of these components naturally wear down—especially the soft silicone pieces that flex with every pump cycle.
If you start noticing reduced suction, leaking, or lower milk output, it might be time to check your parts and replace anything that’s worn or stretched.
Here are the MomMed S21 parts you may need to replace over time:
- Duckbill valves
- Diaphragms
- 24 mm Flanges
- 27mm Flanges
- Flange inserts (17mm, 19mm, 21mm)
- Milk collection cups
If you’re exclusively pumping or using the S21 daily, you may need to replace parts more frequently than someone who pumps occasionally.
Keeping a few extra valves or diaphragms on hand can be a lifesaver—especially during busy weeks when washing parts between every session isn’t realistic.
You can find MomMed replacement parts on their official website or Amazon. And for a full breakdown of when to swap each part, check out my guide on when and how to replace your breast pump parts. Just make sure any parts you order are specifically designed for the S21 model, as others may look similar but won’t always fit correctly.
Troubleshooting Common Issues with the MomMed S21
Even with a well-designed pump like the MomMed S21, occasional hiccups can happen. Thankfully, most issues have simple fixes—and a quick check of your setup is often all it takes to get things working smoothly again.
Here are some common problems you might run into and how to solve them:
Low or Weak Suction
- Check that all parts are assembled correctly and sealed tightly—especially the diaphragm and flange.
- Inspect the duckbill valve and diaphragm for signs of wear, stretching, or small tears. These parts often need regular replacement.
- Make sure the flange is centered on your nipple and that your bra is holding the pump snugly in place without being too tight.
- If you’re using a flange insert, double-check that it’s seated properly inside the flange.
Leaking Milk
- Ensure the flange is fully clicked into place and that there are no gaps between the parts.
- Don’t overfill the milk collection cup—empty it once it approaches the 6 oz (180 ml) mark.
- Check that the duckbill valve is sitting correctly and hasn’t slipped out of place.
- Make sure your bra holds the pump upright to avoid tilting and spillage during use.
Pump Won’t Turn On
- Plug the motor into the USB-C charger and give it time to fully charge—especially if it hasn’t been used in a while.
- Check the power button—hold it down for a few seconds to power on, rather than tapping quickly.
- If the screen doesn’t respond at all, try using a different USB-C cable or outlet to rule out a charging issue.
Uncomfortable Suction
- Try a smaller flange insert if the 24mm flange feels too large.
- Lower the suction level using the minus (–) button and gradually work up to a comfortable strength.
- Make sure your nipple is centered inside the tunnel before you start pumping.
Unusual Noises or Air Leaks
- Disassemble and reassemble the pump to ensure everything is sealed properly.
- Check for a loose flange or diaphragm, which can let air escape and affect suction.
- If the duckbill valve is damaged or off-center, it can cause a whistling or popping noise during use.
Still having trouble? You can check the MomMed S21 instruction manual or reach out to MomMed customer support for help. They’re typically responsive and can assist with warranty issues or replacement parts if needed.
Final Thoughts on Using the MomMed S21 Breast Pump
The MomMed S21 is a lightweight, budget-friendly wearable breast pump that offers a lot of convenience for pumping moms—especially if you’re looking for a simple, no-app, hands-free option.
With multiple flange inserts included, a straightforward setup, and quiet operation, it’s a great choice for both new and experienced pumpers. While it may not have all the high-tech features of more expensive models, it covers the essentials well: reliable suction, decent battery life, and an easy-to-use design that fits right into your bra.
By taking the time to assemble it properly, find your best flange size, and keep up with part maintenance, you’ll be set up for comfortable, consistent sessions whether you’re at home, at work, or on the go.
And if you’re just starting out or trying to make pumping a little easier, I hope this guide helped you feel more confident using your MomMed S21.
Want to take your routine a step further? Check out my pumping schedule guide for tips on building consistency, protecting your supply, and making pumping work for your day-to-day life.


